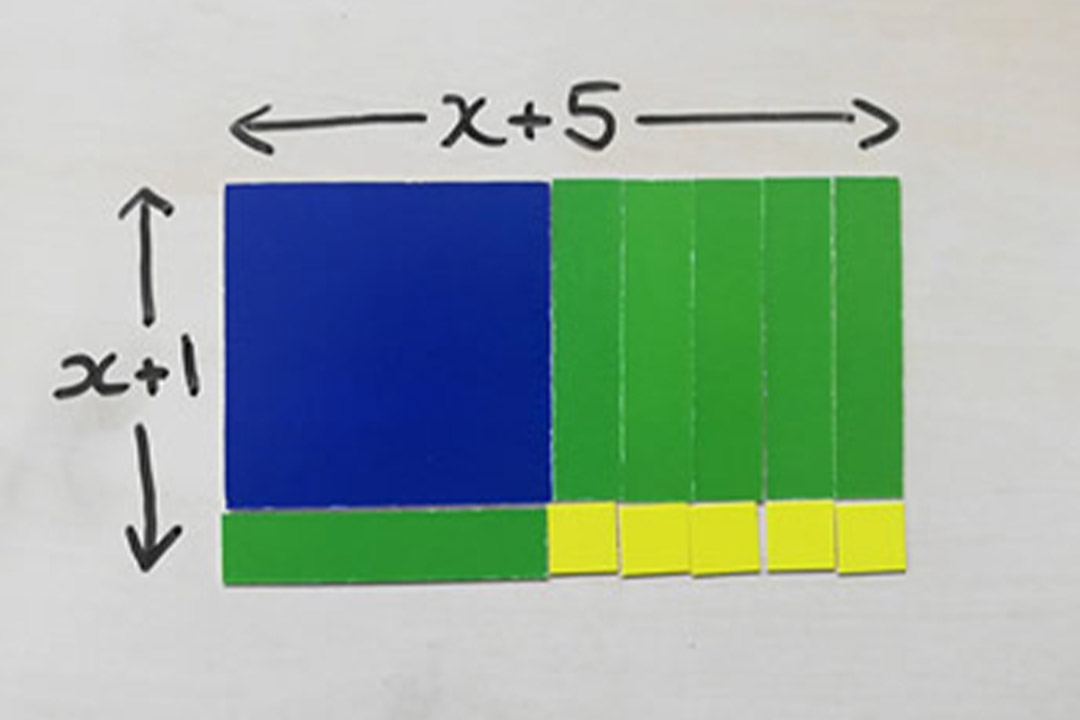
What is the square that is being completed? Algebra tiles can be moved around to represent this manipulation - particularly with students familiar with area models of multiplication from KS3.
03/12/2019

How many times have you taught a Year 11 class how to ‘complete the square?’ Have you ever wondered what square you are completing? In how many of those lessons have you shown an actual, physical square then added some other bits to ‘complete’ it? Or has your board just got filled up with algebraic expressions?
In this article, we show how algebra tiles can give some insight into completing the square and how two teachers have used the Algebra Tiles Guidance Document from the Secondary Mastery Professional Development Materials to support their teaching.
First, let’s look at this diagrammatic representation of completing the square.
Here are some algebra tiles that represent: \(x2\), \(x\), and \(+1\) [dimensions \(x\) by \(x\), \(x\) by \(1\) and \(1\) by \(1\) respectively].

To represent the quadratic , I would use these tiles:

Now, if I were to try to create a square from those tiles using them all, I can see that I am four yellow () tiles short:

This shows that the square is
bigger than the quadratic I started with,
.
So, writing that down algebraically: .
Let’s just remind ourselves how we might have got to this stage algebraically.
| We might have started with | ||
| But we know that | |
|
| So | ||
| And therefore |
Many experienced secondary teachers, who have taught completing the square many times, on seeing this diagrammatic representation say ‘Aaaaah! That’s why it’s called completing the square! I never realised!’
But for a student new to grappling with this notoriously tricky concept, is there a danger of further confusion if new equipment (in the form of these algebra tiles) is suddenly introduced simultaneously? Are we doing algebra, Miss, or are we doing area?
But what if the tiles were very familiar, because the students had used them regularly to help with algebraic manipulation throughout KS3 and KS4? This is where our Secondary Mastery Professional Development Materials can come in useful. In the rest of this article we’ll look at how these materials can help teachers design lessons using diagrammatic representations or hands-on equipment. And we’ll hear from two teachers, Erin and Steve, who’ve found the Algebra Tiles Guidance Document particularly useful.
Returning to our quadratic…
How about if our students were already familiar with using these tiles to represent the expression:

And had previously used them to represent expanding and then factorising quadratics (by creating rectangles):

And how about if area models were already very familiar for representing multiplication?
Our Secondary Mastery Professional Development Materials suggest that area models follow naturally from supporting early understanding of multiplication with arrays:

You can find out more about using algebra tiles as representations for many algebraic manipulations from our set of six videos, or this PDF from our Professional Development Materials.
You can find out more about using arrays and area models in this PDF from the materials.
Erin Butler is a Mastery Specialist and Lead Practitioner from Bishop Perowne CE College in Worcester.
With an eye on using the area model for factorising/expanding quadratics and completing the square in KS4, she describes teaching square numbers to her Year 7 classes (Set 1 and Set 7).
‘I looked at this extract from the materials, where an area model is used to represent the multiplication of two expressions to form a quadratic. I thought about how this could be applied to completing the square.
'I tracked right back to what I was doing with my Year 7 classes, learning about square numbers. I teach a Set 1 and Set 7 (of 7) in Year 7. When I checked prior knowledge with Set 1, all of them could tell me that the square root of 49 is 7, but not one of them could explain why.
'Having thought about the idea of an area model for multiplying algebraic expressions, I could see the benefit this model could have when being introduced in Year 7 with square numbers and used continuously throughout the curriculum. Students fluent in the ability to draw and interpret pictorial representations could apply this tool to develop deeper levels of understanding as they progress though the different stages of their education, applying this to concepts seen in the higher tiered GCSE content. This is what inspired me to teach square numbers pictorially.
'When learning about squares and square roots, we physically made, on our whiteboards, a square one by one, and we talked about ‘’ discovering how that physically created a square. We continued to create squares (two-by-two, etc) and linked our discoveries to the properties that make a square. We discussed how some numbers get the name ‘square’. Because they make a square!
'This gave me an opportunity to talk deeply with them about inverses, what makes a perfect square, what the difference is between a square number and squaring a number, between square rooting any number and square rooting a perfect square.
'With Set 7, I started in the same way, by drawing pictures. They struggled to understand that the dimensions didn’t represent the square number. They had their ‘lightbulb moment’ when I asked them to prove whether 5 was a square number. They discovered that no matter how they manipulated the picture they could never create a square using 5 tiles.'